*Display and setting items may differ depending on the device used.
When a device (hardware) is installed on a computer, a COM port is automatically
assigned. (COM1, COM2, etc.)
General-purpose package software (application software) uses this COM port
to perform serial communication.
Depending on the environment, COM ports may not be assigned sequentially
starting from CH1 on the device.
Therefore, check which CH number on the device corresponds to which COM
port, and then specify the COM port on the general-purpose package software.
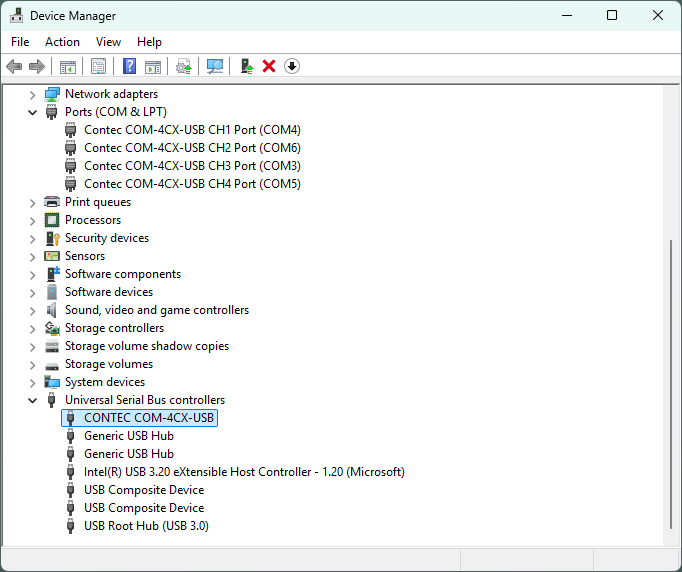
1. Start the Device Manager.
2. Confirm if the recognized device is displayed in the [Universal Serial Bus controller] folder.
Ex) Connected with COM-4CN-USB
*Display and setting items may differ depending on the device used.
3. Confirm if the added COM port is displayed in the [Ports (COM & LPT)] folder.
You can also change the COM port number from Device Manager.
1. Display the properties of the device you want to change in the [Ports (COM & LPT)] folder.
2. Select the [Port Settings] tab in the properties window and click the [Advanced...] button.
Ex) Connected with COM-4CN-USB
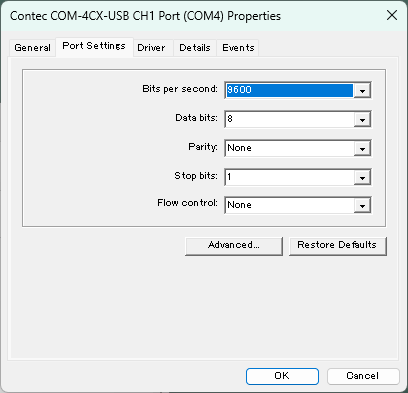
*Display and setting items may differ depending on the device used.
3. You can change the COM port number in the [COM Port Number] combo box in the [Advanced Settings for COM] window.
Ex) Connected with COM-4CX-USB
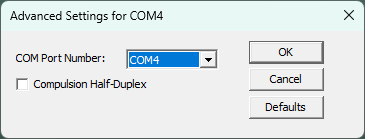
* Display and setting items may differ depending on the device used.
Supplement :
By checking [Compulsion Half-Duplex], the software setting can be forcibly
switched from full-duplex communication to half-duplex communication.
The COM port number can be reassigned using the [COM Port Number Setting
Utility].
For details, refer to the [COM
Port Number Setting Utility] topic.